
Table of Contents
“I Just Looked Left And Felt Weird”: 10 Ways To Actually Beat VR Motion Sickness
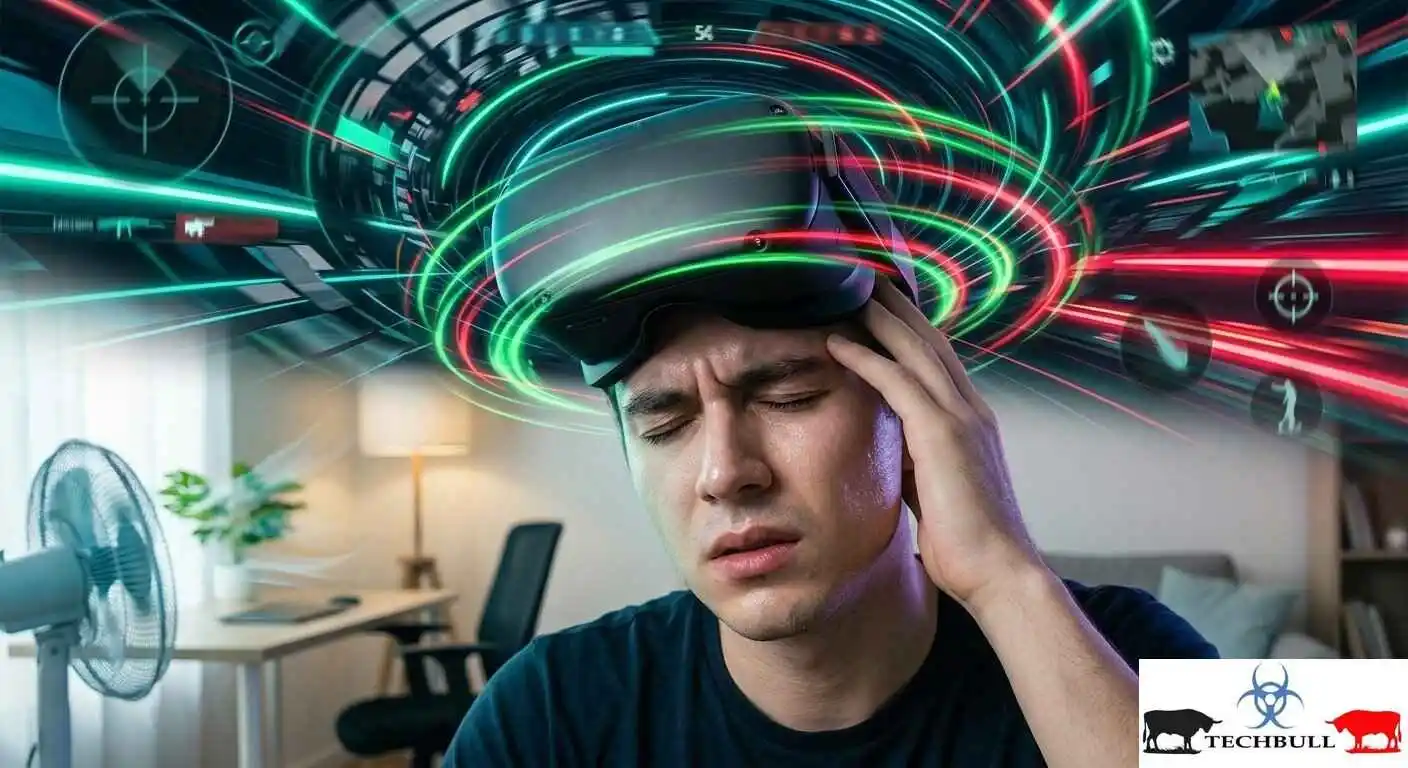
You strap on the headset, launch that flight sim you’ve been hyping all week, and about ninety seconds into takeoff, the room gets weird. Your stomach lurches. The world smears at the edges. You pull the visor up and stare at the ceiling, trying to decide whether this is the game’s fault or a bug in you.
Sound familiar?
Here’s the thing nobody tells you when they sell you a headset: the number one reason people stop using VR isn’t battery life, price, or even the libraries. It’s VR motion sickness. And it’s not because your game is low-budget. It’s because your brain just got handed a contradiction it wasn’t built to resolve, and every headset, every tracking rig, and every “cinematic camera” can make it worse or better.
I’ve spent the last few years in the VR industry — building experiences, tuning comfort systems, and mostly doing damage control for people who just wanted to watch a cutscene. The good news: you have more control over this problem than the marketing suggests. Most of the fixes cost nothing, and most of them are about setup, not software.

This guide walks through 10 concrete ways to reduce motion sickness when using VR, in roughly the order I’d actually apply them. No hand-waving, no “just take it slow” platitudes. Let’s dig in.
Nail Your IPD and Fit Before You Press Play
If I could only give you one piece of advice, it would be this: most “VR motion sickness” is actually a headset that doesn’t match your face.
Your headset is built for an average human head. You are not an average human head. The distance between your pupils — your IPD (inter pupillary distance) — ranges roughly from 54mm to 74mm across the population, and headsets that force everyone into a 63mm sweet spot are asking your eyes to do cross eyed gymnastics all session. Your brain gets two slightly different images it can’t fuse cleanly. Result: strain, and strain is the cousin of nausea.
What to do:
- Measure your IPD. Yes, really. A free app or even the classic “measure the distance between the centers of your pupils in a mirror” trick works. The important thing is knowing the number, not guessing.
- Adjust the hardware if you can. The Meta Quest series has a dial; the Valve Index has IPD sliders on the face gasket; the Pico 4 has a physical adjustment. Take two minutes to do it right. It is the single highest-leverage comfort setting most people never touch.
- Check the face gasket. An oversized gasket that touches your nose or brow shifts the optics off-axis and creates the exact “wrongness” that reads as sickness. Try a smaller gasket or a third-party foam.
- Remove glasses if possible. Prescription inserts or, better, a proper prescription IPD-matched lens set. Stacking glasses under a headset is a known contributor to the problem.
The test that tells you it’s fixed: put the headset on, open the system browser (a flat, static UI), and look around the room for sixty seconds. If the world doesn’t feel “double” or your eyes don’t ache, your IPD is close enough to move on. If they do, stop and fix it first. Everything downstream gets easier once this is right.
Master Your Refresh Rate and Performance Budget
This is the section where people usually nod, and then I watch them ignore it.
The core enemy of motion sickness in VR is latency and jitter — the moment your head moves and the world doesn’t move, all the way to the frame that takes too long to render. Two numbers matter: your refresh rate and your effective frame rate.
What to do:
- Turn on the highest refresh rate you can actually sustain. On Quest, that’s 72Hz vs. 90Hz vs. 120Hz. If your game at 120Hz dips into the 70s and stutters, drop to 90Hz and hold it steady. A stable 90 beats a wobbly 120 every time.
- Watch the performance overlay. Every headset ships with a frame-time or performance HUD. Use it for your first session in a new title. If you see red or you see the frame counter falling off a cliff, that’s your motion-sickness trigger.
- Lower rendering resolution, not visual fidelity. This is the underused superpower. On Quest you can drop the resolution scale to 80% or even 70% and the game still looks acceptable while your frame time breathes. On PC VR, this maps to resolution scale in your runtime.
- On PC, enable ASW (Asynchronous Space warp) or its equivalent. It reconstructs the frame your eye actually sees using the newest available render, which hides hitches. It’s a real comfort win, not just a spec.
Quick reference — what’s a good target?
| Platform | Target | Comfort floor |
| Quest 3 / 3S | 90Hz at ≥80% res | Never below ~70fps effective |
| Valve Index | 120Hz or 90Hz locked | No hitch > 33ms |
| Pico 4 | 90Hz | Stable, no dips |
| PC (generic) | 90Hz locked + ASW | Sub-11ms motion-to-photon |
The point isn’t to look like a benchmark chart. The point is to make your frame delivery predictable. Your vestibular system hates surprises more than it hates anything.
Tune Your Comfort Settings (Yes, The Ones You Ignore)
Open your headset settings. You’re going to be surprised at how much is already in there waiting for you.
The big three comfort toggles:
- Comfort vignette — a soft dark ring around your peripheral vision. It’s not a gimmick; it reduces the peripheral motion that feeds the nausea signal. Start with it on at “strong” for anything new or intense.
- Teleport vs. smooth locomotion — this is where beginners get it backwards. Teleport is the safe default. Smooth (analog stick) movement is more immersive but also the #1 trigger for first-time sufferers. Learn with teleport, earn smooth movement later.
- Collision / tether mode on PC — a physical boundary your avatar respects. It keeps you grounded in a real space, which paradoxically makes the virtual space feel less like it’s sliding under you.
A practical sequence I use with new players:
- First session: teleport only, comfort vignette strong, refresh rate moderate.
- Second session: try smooth locomotion in a low-intensity title, vignette medium.
- Third session: smooth in a real game, vignette light.
- Only then: remove the vignette entirely.
It’s boring. It works. The vignette is your “training wheels” — take them off one at a time.
Change How You Move Through Virtual Space
Locomotion is where VR motion sickness lives or dies, so it’s worth a section on its own.
Teleport (the anchor move). You aim and press, and the avatar snaps. Your eyes see the new position before your body “moves,” which matches how you actually walk in the real world — you look, you move. It’s the gold standard for comfort. Use it in any game with combat or fast movement if you’re still building tolerance.
Snap turn vs. smooth turn. Small horizontal rotations (under ~40°) are usually fine. Big swings are where you puke. Most games have a “snap turn” setting that quantizes your view into ~45° steps instead of a continuous sweep. It feels clunky at first. Your inner ear thanks you. Turn it on.
The “strafing” problem. Walking left/right via an analog stick is worse than forward/back for most people, because the visual flow doesn’t match a real gait. If your game lets you choose, favor forward-only movement with head-look for direction, not body-turns.
Grip or “grounded” options. Some experiences offer a subtle world anchor — a visual element that stays fixed relative to your physical body (the controller, a hand model, a floor marker). This gives your brain a real-world reference point and is one of the most underrated comfort tools in the space.
Rule of thumb: the more your body feels like it’s moving without a corresponding visual cue, the worse it gets. Every locomotion choice is really just a question of how well it fakes that match.
Build Your Physical Foundation
This is the part people hate, because it sounds like “just do pushups.” But it’s the truth, and it’s the reason some people can fly through a space shooter for two hours and others last ninety seconds.
Your vestibular system (the inner-ear balance hardware) adapts to motion the same way any other system does — through repeated, low-stakes exposure. This is literally how flight sim pilots, rollercoaster diehards, and sailors build tolerance. You can do it in VR, deliberately.
A 6-week tolerance plan (realistic, not heroic):
- Week 1–2: 10–15 minutes, teleport only, static scenes. End the session before you feel anything. This is the key — stopping early keeps the exposure “safe” in your brain’s ledger.
- Week 3–4: 15–20 minutes, introduce one smooth-movement title. Still stop at the first warning sign.
- Week 5–6: 20–30 minutes, mixed locomotion, vignette off.
- Ongoing: a weekly “comfort session” — a slow walk around a room, looking up and down. Five minutes. It maintains the tolerance you built.
Hydration and food matter more than you think. An empty stomach turns a mild signal into a real one. A dehydrated session amplifies everything. Eat something, drink water, and don’t do a first session in a brand-new headset after a night of bad sleep. Your baseline tolerance is a moving target, and it’s lower than you remember.
Breathing is not a cliché. Slow, long exhalations (4-2 breathing) genuinely lower the nausea signal by calming the vagal response. It’s not woo-woo; it’s the same thing anesthesiologists tell patients in the recovery room. Use it the moment you feel it coming, not after.
Design Your Room (The Physical World Is Part of the Headset)
A huge share of “I felt weird” comes down to the physical environment you’re standing in. The headset tells your brain you’re in a virtual room; if the real room fights that story, you get a fight.
The non-negotiables:
- A clear, bounded space. Mark your guardrails (Quest calls it a Guard boundary; PC uses a play area). Make them bigger than you think you need. The more physical walls you can feel, the more your brain has to reconcile two spaces. A wide, open, visible space reduces that load.
- Good lighting, not none. Total darkness is the worst case. You want enough ambient light that when you pull the visor up, your eyes don’t have to do a full iris recovery. A lamp at 30% is enough.
- A floor you can feel. Carpet under your feet, a visible horizon behind you, the sense of where down is. Floating in a dark room on a shag rug is the worst possible physical starting state.
- Sit vs. stand, deliberately. Many people do better seated at first. Not because it’s “easier” — because a fixed pelvis removes one whole axis of real-body motion your brain doesn’t have to explain. Stand up when your tolerance is higher, not on day one.
The “window” trick. If your real room has a window, sit so you’re not looking toward it while playing, but know it’s there. If your room is a closet, that’s fine — but your guard boundary is going to be tight, which means your physical headroom is limited, which means your virtual headroom gets compressed. Know the constraint before you start.
Choose Your Content Like a Strategist, Not a Tourist
Not all VR is created equal, and the fastest way to build a bad relationship with the tech is to open the store and buy the most “immersive” thing in sight.
The difficulty ladder (start here, not at the top):
- Rung 1 — Static: meditation, music, a virtual desktop, a room-scale puzzle where you don’t move your body. Great for a first 20 minutes.
- Rung 2 — Low motion: a walk-and-talk, a crafting game, a shooter where the camera is your head and the world moves in front of you slowly.
- Rung 3 — Active locomotion: running, jumping, a first-person shooter with smooth movement. This is where tolerance is tested.
- Rung 4 — Forced motion: flight simulators, car rides, zero-g, anything that moves you through the world rather than you through it. Save these for last, and start with a grounded, slow variant.
Read the comfort notes. Every good store page lists “comfort features” — teleport, vignette, collision. If a title lists none of them, that’s a signal. It means the developer either (a) didn’t care, or (b) built something that requires you to just push through. Neither is a good fit for a beginner.
Match the game to your day. A long day, a big meal, or a stressful shift lowers your tolerance. Pick the right rung for today, not for the version of you from last Tuesday when you were well-rested and curious.
Use the Software Tools That Are Already in Your Headset
Before you go hunting for a third-party app, know that your headset ships with a real comfort toolkit and most people never open it.
What to look for:
- Motion smoothing / ASW on PC — as covered in section 2. It’s on a switch, often default-off, and it helps more than any single game setting.
- Foveated rendering — on Quest, this renders only the area your eye is looking at in full resolution and the periphery cheaper. It’s mostly a battery/frame-time win, but it also means fewer periphery pixels to cause the “smear” effect.
- Comfort vignette and collision — covered, but these live in the settings menu, not the game menu. Some games don’t expose them; the headset does.
- Pupil tracking on newer hardware — if you have it (Quest 3, Pico 4), foveated rendering plus eye tracking is a real comfort feature, not just a spec. The rendering budget follows your gaze, which means the central visual field — the one your motion signal cares about most — stays clean.
The one app worth installing: a simple “comfort trainer” or a static room-scale walk. There are a handful of free titles specifically for tolerance-building. Ten minutes of a slow walk through a calm forest is more effective for nausea than any reading. It’s the same logic as section 5, just with the software doing the exposure.
Manage Your Expectations and Your “Off Switch”
Here’s the advice that’s true but nobody wants to hear: the best VR session is the one that ends before it becomes a problem.
A 90-second nauseating session teaches your brain that “VR = danger.” Ten great 15-minute sessions teach it that “VR = safe.” The second pattern is how every comfortable VR user you know actually got there — they just don’t remember the accumulation, because it never hurt.
The 20-20-20 variant for VR:
- 20 minutes in
- 20 seconds eyes-open, look at something far
- Then again
It sounds too simple to work. It works, because it gives your vestibular system a reset and your eyes a focal break. Do it at natural lulls, not mid-fight.
Know your “off switch.” That half-second before the room tilts, the faint metallic taste, the “why is my chest tight” feeling — that’s your signal. It’s not a warning you should push through; it’s the event. If you catch it, the next 60 seconds of stopping is far cheaper than the 30 minutes of regret after you didn’t.
Hydrate between, not just at. A glass of water at minute 15 does more for minute 30 than the water you chugged at minute 1. Nausea compounds with dehydration, and dehydration is slow.
When the Headset Is the Problem, Not You
Sometimes, after all of the above, the issue is the machine and not the person. This is where people usually blame themselves, and it’s the most frustrating part of the whole thing.
The hardware checklist:
- Tracking. If your headset drifts — the world slowly slides, the floor tilts when you’re still — that’s a tracking calibration issue, not a tolerance issue. Recalibrate. Move away from reflective surfaces, strong light, or a dark uniform room. A tracking problem is indistinguishable from mild sickness until you notice the world is moving while you aren’t.
- Lens/eye alignment. A loose or misaligned eye offset setting (separate from IPD) can do the same “double vision” thing. Most headsets let you offset per eye. If one side feels “off,” tune it.
- Firmware. Comfort features are still being improved. The difference between the comfort behavior of a headset at launch and six months after can be a real, measurable gap. Update before you declare a title “nausea-able.”
- Controller latency. Cheap add-on controllers or third-party trackers add input lag that the world doesn’t. A half-second delay between your hand and the virtual hand is a known nausea trigger, even if you don’t consciously notice it.
The diagnostic that separates the two: close your eyes inside the headset (or pull the visor down halfway) and move your head. If the world jumps or drifts rather than staying put, it’s a tracking or calibration issue. If the world is smooth and steady but you still feel bad, it’s a comfort/tolerance issue. Different fixes. Different problems. Name it right before you spend an hour tuning the wrong knob.
A Quick-Reference Cheat Sheet
| Problem | First thing to try |
| “Everything looks double or smeared” | IPD and gasket fit |
| “Stutters and hitches” | Lower resolution scale, lock refresh rate, enable motion smoothing |
| “Smooth movement makes me sick” | Switch to teleport + snap turn, keep vignette on |
| “It gets worse after 30 min” | Take a 20-second break, hydrate, shorten the session |
| “World slides when I’m still” | Recalibrate tracking, check eye offset |
| “First session in a new headset” | Static content, 10 minutes, stop early |
The pattern you’ll notice: fix the hardware, then the settings, then the technique, then the tolerance. Most people skip the first two and go straight to “just push through,” which is the least effective path and the most common one.
FAQs
- Is VR motion sickness dangerous?
No. It’s a mismatch signal, not damage. The risk is only if you keep playing through it and get genuinely ill — which is why stopping early is the advice. - Does it go away over time?
Usually, yes. Most people build tolerance in weeks if they follow the exposure pattern in section 5. A small percentage never fully do, and that’s fine — you can still enjoy static and low-motion content. - Why does teleport work but smooth movement doesn’t?
Because your brain can reconcile a teleport the way it reconciles a real step — a discrete jump. Smooth motion is a continuous mismatch between what your eyes say and what your inner ear says. Teleport sidesteps that by being a clean “reset.” - Does the room I’m in actually matter?
More than you’d think. A bounded, well-lit, grounded physical space reduces the brain’s load of reconciling two worlds. See section 6. - Can I wear glasses in VR?
You can, but it adds bulk and can shift the optics. Prescription inserts or IPD-matched lenses are better. If you must wear glasses, keep the gasket small so they don’t press against the lenses. - What’s the ideal IPD range?
Most people are between 54mm and 74mm. Headsets that only offer 63mm±2mm will be a bad fit for the tails. Measure yourself. - Does refresh rate matter more than resolution?
For comfort, yes. A stable 90Hz at 80% resolution beats a jittery 120Hz at 100%. Jitter is the enemy. - Is the comfort vignette a cop-out?
No. It reduces peripheral motion, which is a genuine physiological input to nausea. It’s training wheels, not a cheat. - How long should a beginner session be?
10–15 minutes for the first few sessions, ending before you feel anything. Length grows with tolerance, not with ambition. - Does hydration really affect motion sickness?
It does. Dehydration amplifies every discomfort signal. A plain glass of water before and during is cheap insurance. - Can I build tolerance without playing “bad” games?
Yes. Ten minutes of a slow walk in a calm, low-motion title is a legitimate tolerance session. That’s the whole point of section 5. - What’s motion smoothing and does it help?
It’s a frame-reconstruction feature (ASW on PC, similar on Quest) that hides hitches by blending the newest render with your head pose. It’s one of the single biggest comfort wins available. - Do all headsets have comfort features?
No. Older and budget headsets may have very few. If you’re a known motion-sickness sufferer, buy a headset that explicitly supports vignette, teleport, and refresh-rate control. - Why do I feel fine in the real world but not in VR?
Because the real world gives you every signal at once — vestibular, visual, proprioceptive, and they all agree. VR gives you a mismatch between at least two of them. The mismatch is the sickness. - Does food help or hurt?
An empty stomach hurts. A heavy, greasy meal can also be a problem because it slows everything. A light meal two hours prior is the sweet spot. - Can I use motion-sickness medication?
Talk to a doctor first, but OTC options like meclizine are something some players report help for specific sessions. It’s a tool, not a cure, and it has side effects. - Why do car rides and VR feel different, yet both make people sick?
Both are forced visual motion without a matching body signal. The mechanism is the same; the inputs are different. If you’re prone to car sickness, you’re likely prone to VR sickness — but you can train both. - Does zero-gravity or flight content make it worse?
It can, because it adds rotation axes your inner ear is bad at explaining. It’s the top of the difficulty ladder for a reason. Earn it. - Can I skip the tutorial and jump into a fast game?
You can, but you’ll regret it on session one. The tutorial is also the comfort system being explained to you. Read it. - Is there a difference between “feeling weird” and “actual nausea”?
Yes, and you should act on the first one. The moment you notice the edge-of-the-room feeling, that’s your cue to stop, not a warning you’re allowed to ignore. - Do I need a specific game to build tolerance?
No. A simple, free, slow-walk title is ideal. The content matters less than the pace and the stop-early discipline. - Why does the world feel “off” when I look down in VR?
Often it’s the eye offset or a vertical IPD issue. Or the tracking is drifting. Check both. - Can standing up mid-session make it worse?
It can, if you do it quickly. The shift in your visual field and your vestibular reset can trigger a spike. Sit and stabilize, then stand. - Does playing at night make it worse than during the day?
It can. Your circadian baseline is lower, your eyes are more tired, and you’re less likely to have a bright reference. Many people do better in the morning. - What’s the “20-20-20” rule for VR?
Twenty minutes in, twenty seconds looking at something far, repeat. It’s a reset for both your eyes and your vestibular system. - Can I train tolerance with just my head, no body movement?
Yes. Slowly rotating your head in a static scene, with no movement, is a valid and gentle exposure exercise. - Do all people have the same tolerance?
No. It varies hugely with age, sex (women report it more often), car-sickness history, and individual vestibular sensitivity. There’s no “normal.” - Should I avoid fast-pacing titles entirely as a beginner?
Not forever. Start on the low rungs, and introduce them as your tolerance builds. They’re the whole point of the medium, eventually. - Does the comfort vignette affect battery life?
Negligibly. It’s a render overlay, not a power draw. Turn it on without that worry. - What’s the one thing that helps more than anything else?
The single highest-leverage action is nailing your IPD and face fit. Everything else is tuning. If the optics are wrong, no amount of settings will fix the underlying strain.
VR motion sickness isn’t a bug you have to tolerate, and it’s not a character flaw. It’s a mismatch between two systems — your eyes and your inner ear — and it’s mostly about setup, mostly about physics, and mostly fixable.
Here’s the order I’d actually do it, if I were starting from zero:
- Fit the hardware. IPD, gasket, glasses. Spend ten minutes. It pays off for the rest of your VR life.
- Fix the performance. Lock a refresh rate, lower the resolution scale, enable motion smoothing. Make the frame delivery predictable.
- Learn the safe movement. Teleport first, snap turn on, vignette on. Earn smooth movement over weeks, not hours.
- Build the tolerance deliberately. Short sessions, stop early, hydrate, breathe. Six weeks of ten minutes beats one heroic two-hour session every time.
- Pick the right content for the right day. Not the most immersive thing you found. The right rung.
Do those five things and you’re ahead of the vast majority of people who’ve given up on the medium. The ones who stick with it aren’t the ones with the strongest stomachs. They’re the ones who treated comfort as a system instead of a test they failed.
Your move: before your next session, take the ten minutes to measure your IPD and adjust the headset. That single action will do more for your comfort than anything in this post. Do it tonight, not next month — the difference between “VR is hard on me” and “VR just clicked” is usually that one ten-minute setup step you never did.
Disclaimer: The content on this blog is for informational purposes only. The author’s opinions are personal and not endorsed. Efforts are made to provide accurate information, but completeness, accuracy, or reliability are not guaranteed. The author is not liable for any loss or damage resulting from the use of this blog. It is recommended to use the information on this blog at your own discretion.
